Bunnies, chicks and colorful eggs! What do these all have in common? Your child can use them as subject matter for imaginative Easter art. While holiday-themed coloring pages and workbooks have their place, why not go a step farther and set your child up with an Easter art adventure? Check out these creative crafts for an afternoon of artsy fun.
Peep Prints
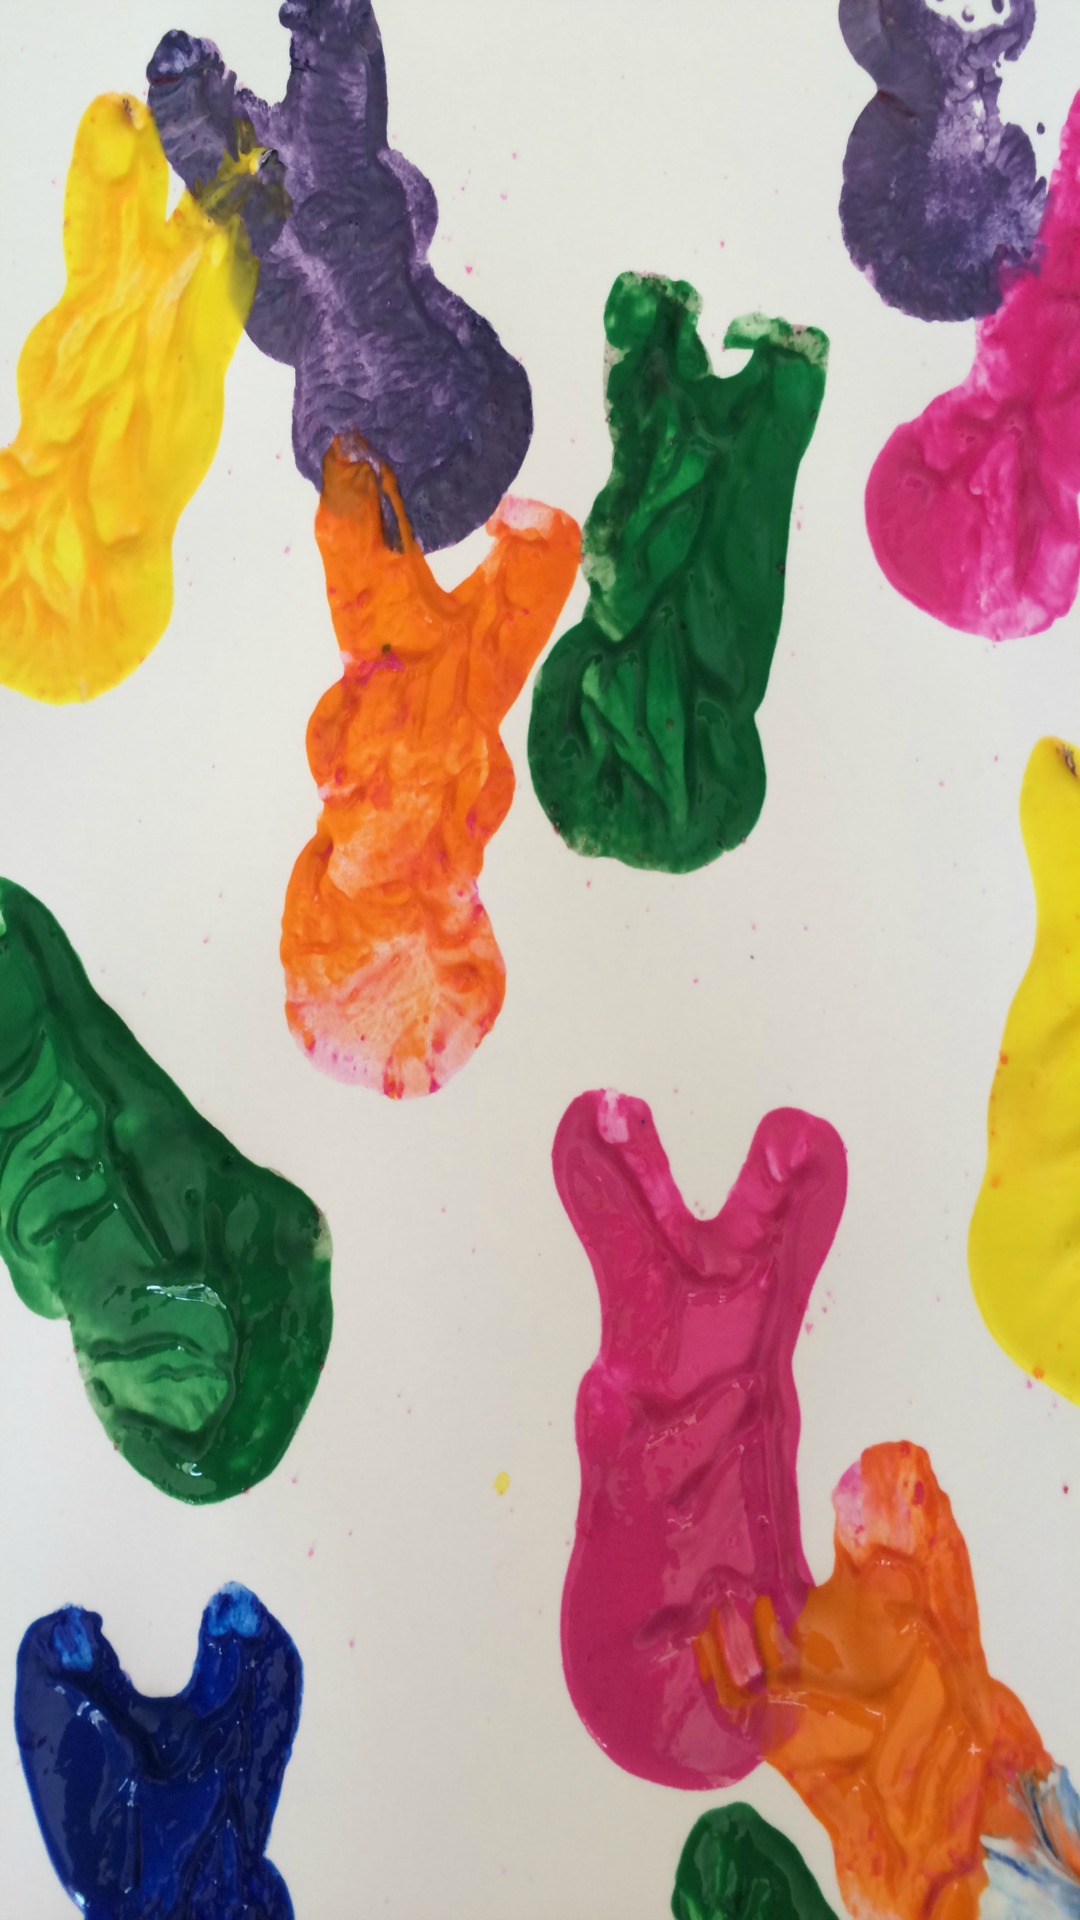
You accidentally left the bunny-shaped marshmallow treats out overnight. Now they’re way too hard to eat with ease. Instead of tossing them in the trash, use them for a pint-sized print-making project. Kids from toddlers to tweens can easily create these colorful rabbit prints. Adapt the activity for your child’s age. Younger children (toddlers and preschoolers) can play with the paint, mixing colors, dabbing it on with their fingers and smooshing the tempera onto the paper in bold splats! Older kids can make more precise prints, create alternating patterns of colors or design a picture out of the shapes. For example, your child can use the marshmallow bunnies as stampers to make an oval Easter egg image.
Materials:
- Bunny-shaped Easter peeps
- Cardstock paper
- Tempera paint
Instructions:
- Pour the paint onto a palette, foam tray or piece of wax paper. Make a few peep-sized pools.
- Dip the bunny (flat-side down) into the paint. Make sure that your child coats the entire surface.
- Press the paint-covered rabbit onto the cardstock paper.
- Repeat with different colors to make more prints.
Easter Egg Pattern Play
Reuse your plastic Easter eggs, turning them into a playful pattern creations. This activity isn’t just artistic, it’s also educational. Your young child can explore basic math concepts, such as shape and pattern, through this spring-time craft!

Materials:
- Plastic Easter eggs
- Tempera or finger paints in at least two colors
- Construction paper
Instructions:
- Pour the paint into pools (just like you did for the peep print project).
- Open the plastic eggs to make halves.
- Place the open (larger, circle-shaped) end of the plastic egg into the first paint color.
- Press the egg onto the paper.
- Clean off the egg or use another half. Press the open end into a second paint colors.
- Print the second color next to the first.
- Repeat the printing process with the first color, or add a third. At this point, your child can create a pattern of two, three or more alternating colors. She can make one straight line or rows and rows of egg prints.
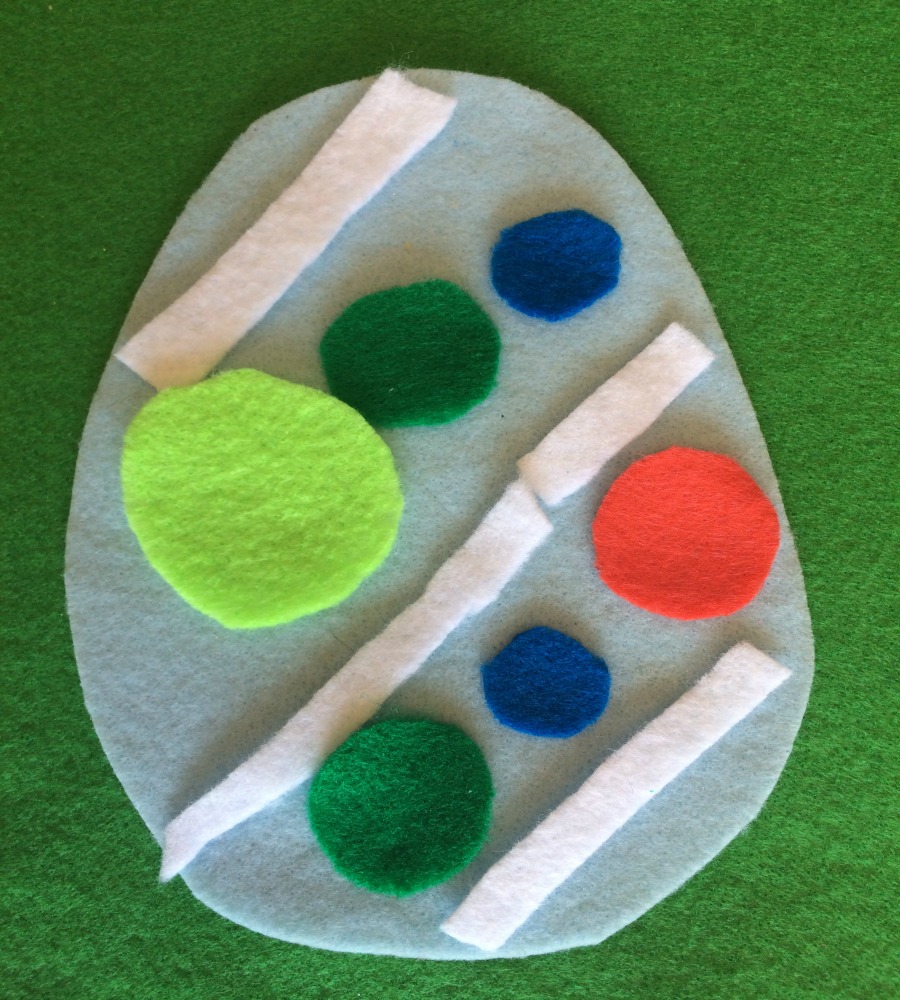
Felt Fun
Turn a traditional paper and glue collage into texture-filled fabric fun! Your child can create an Easter bunny, chick or design her own faux egg using felt shapes. She can puzzle the pieces together and glue them down or make a less permanent picture that she can rearrange at will.
Materials:
- 8×10-inch craft felt sheets
- Scissors
- Clear-drying school glue
- A marker
Instructions:
- Draw shapes (circles, ovals, rectangles, squares and triangles) onto the felt with a marker. Choose several shapes in different sizes. If your child is struggling to draw the shapes by herself, give her a stencil or make your own template with a pieces of cardboard to trace.
- Cut the shapes out.
- Piece together a bunny, chick or decorated egg with the shapes onto a whole piece of felt. For example, a large circle with two smaller ovals on top looks like a bunny’s head and a yellow circle with an orange triangle in the center is the start of a chick.
- Glue the shapes down. Your child also has the option to simply stick the shapes down (the felt shapes will hold on to the felt sheet) and reuse them later.
Now that you’ve got a few creative crafts up your sleeve, show us what your child made! Share your child’s Easter artwork with us or let your friends know what you’re up to by sharing these crafts on Facebook, Twitter or Google+!